How to Make Custom Music Ringtones Using iTunes (Solution)
When trying to get ringtones for your Apple iPhone, you have a few different options. You could purchase ringtones from within iTunes, or you can create ringtones from your existing music library using these steps.
Note: These steps will only work for music purchased from the iTunes Store. You can check if an item was purchased by right-clicking the top sort bar and checking the Kind option. Items will show as “Purchased” or “Protected” if they were purchased via iTunes.
- From within iTunes, go to “Edit” > “Preferences” > “Import Settings“.
- Ensure the “Import Using” setting is set to “AAC Encoder“.
- Go to your music library, right-click/ctrl-click the song you wish to use for a ringtone, then select “Get Info“.
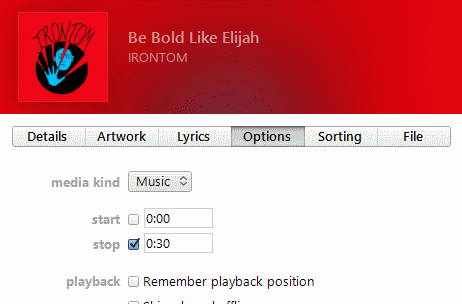
- Under the “Options” tab, check the “Start Time” and “Stop Time” boxes, then set the song up to play at a 30 seconds or less interval. In this example, I’ve stopped it at 30 seconds (0:30). Click “OK‘ when finished.
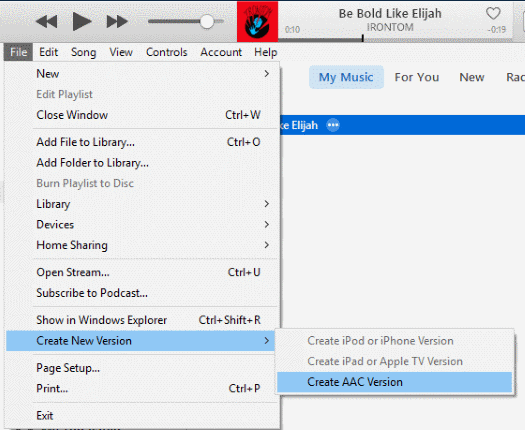
- While the song is still highlighted in iTunes, select “File” > “Create New Version” > “Create AAC Version“.
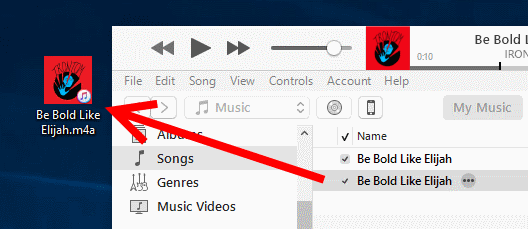
- A new 30 second version of the song is created in iTunes. Drag and drop this file to your desktop.
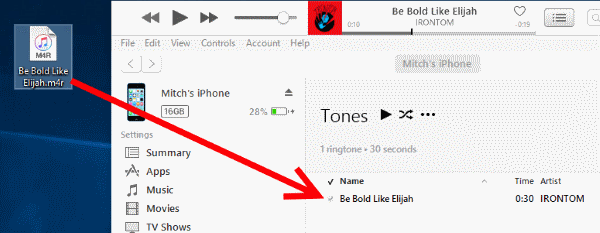
- Right-click the file on your desktop and rename it with a .m4r extension.
- Connect your iPhone to your computer.
- In iTunes, select the icon for your device, then open the “Tones” option under the “On My Device” section.
- Drag the music file we re-named in step 7 to the “Tones” folder in iTunes.
- Select the “Tones” option in the “Settings” section and ensure the “Sync Tones” is checked.
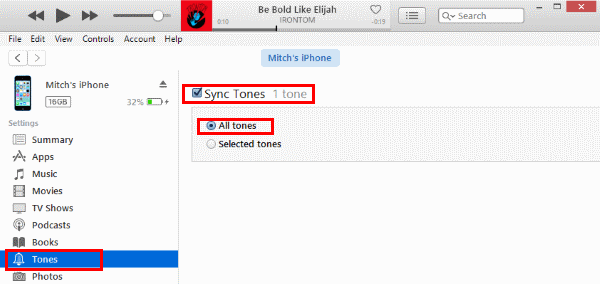
- Press the “Sync” button to sync iTunes with your iPhone.
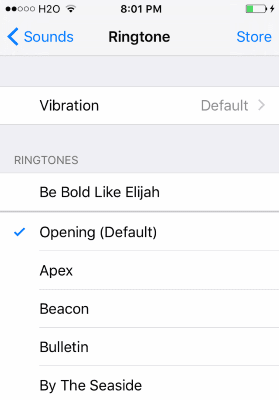
- After syncing your device, the song is now available to select as an iPhone ringtone under “Settings” > “Sounds” > “Ringtone“.
Once you’re done with all this, be sure to right-click the song we originally used, choose “Get Info” and set the interval back to normal under the “Options” tab.
These steps work for iTunes for Windows, Linux, and MacOS on your computer and all versions of iOS for your iPhone.


No comments:
Note: Only a member of this blog may post a comment.